Write a template
Templates are plugin nodes that you use to configure the attributes and relationships of nodes in a graph. Each template is a subclass of cwSubmission and generates a particular type of graph topology. Examples:
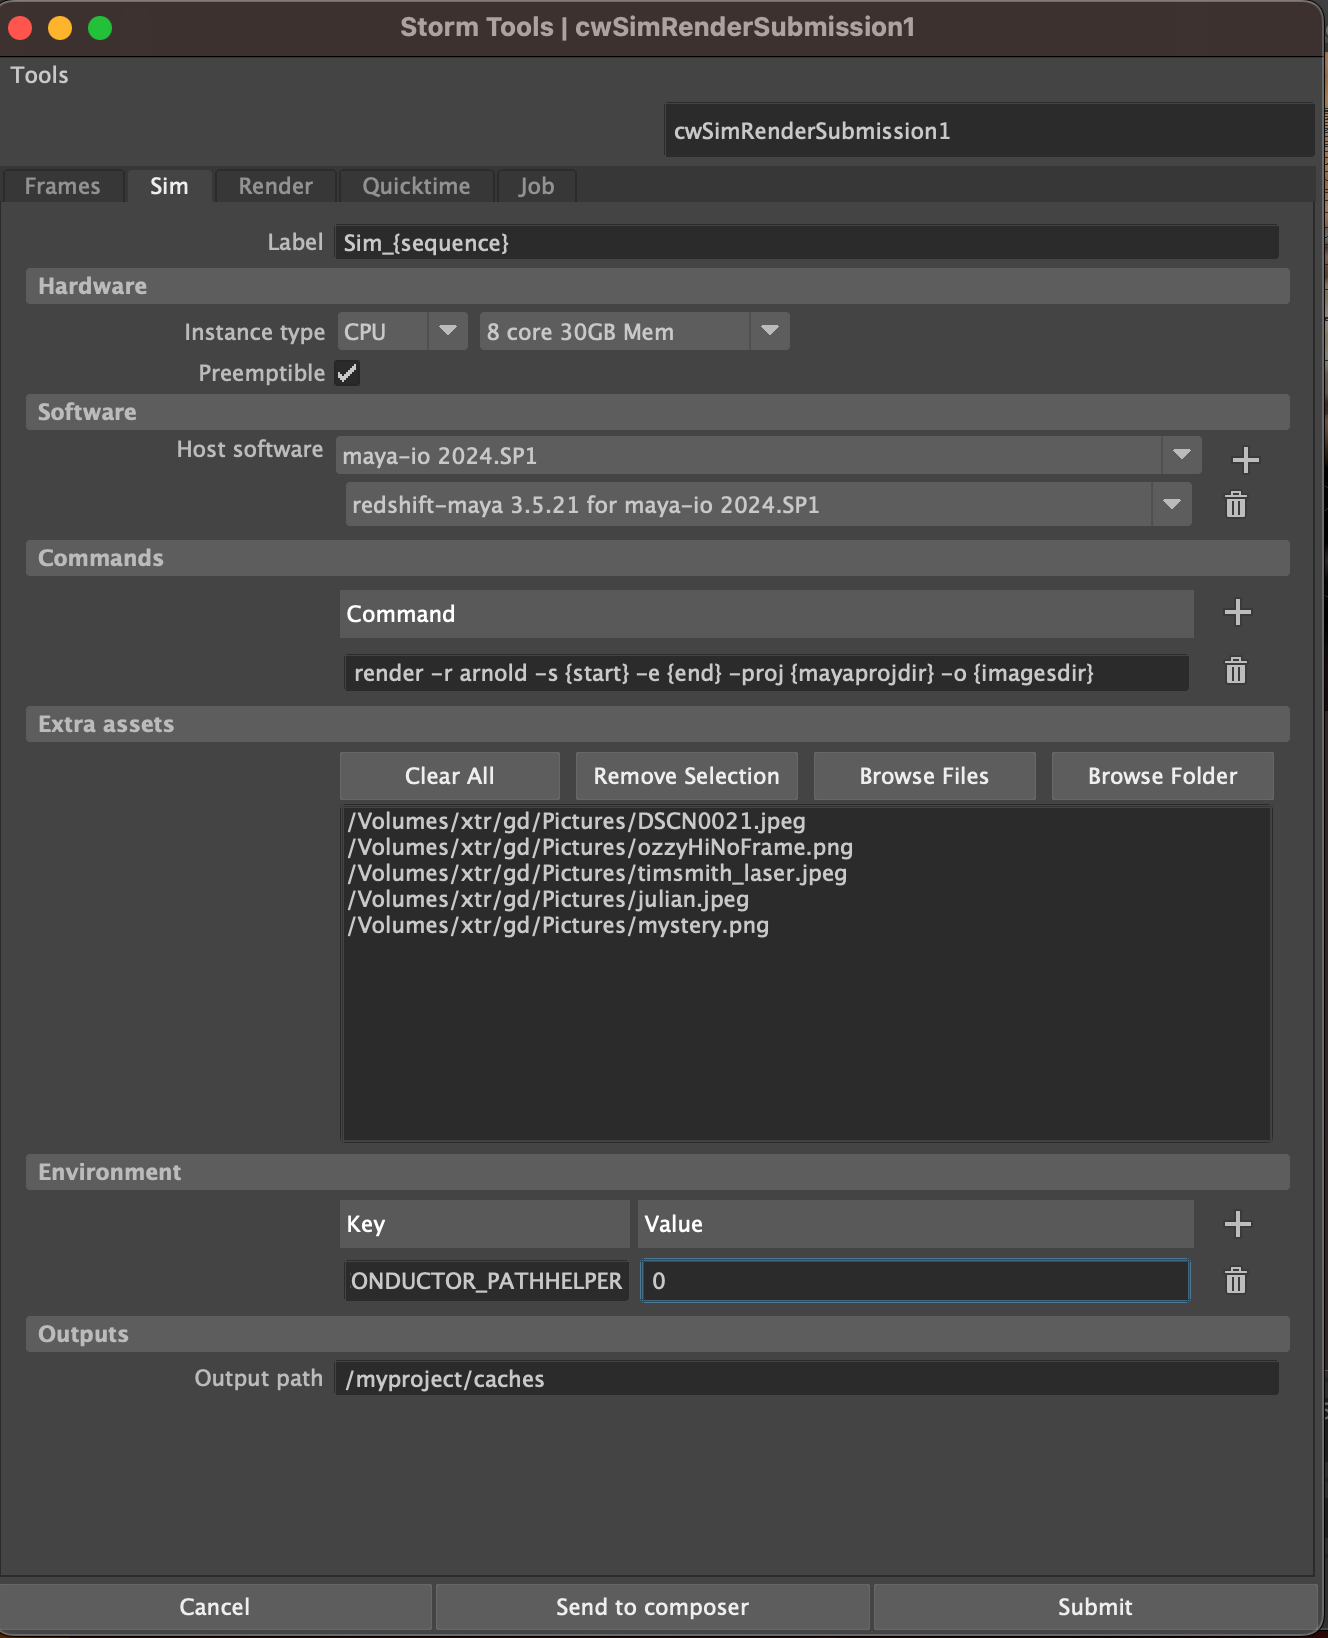
cwSmokeSubmissionCreates a graph with a single work node. It is designed for testing the submission process only.cwSimRenderSubmissionCreates a graph with a simulation node, an array of render nodes, and finally a quicktime node. It is designed for caching simulations, rendering them out, and then compositing them together. As far as the template is concerned, the three types of nodes are identical. What matters is the way they are connected. Edges from the sim node fan out to each render node, and edges from each render node fan back in to the quicktime node, meaning the render nodes don't start until the sim node is done, and the quicktime node doesn't start until all the render nodes are done.cwChainSubmissionCreates a graph with a chain of work nodes. It is designed for running variable length array of tasks in a particular order. Each work node is dependent on the previous one.
To write your own template I suggest you refer to the three template implementations in the template folder while reading these instructions.
Implement a template
- Create a new folder with the name of your template. Eventually we'll make it possible to register templates as plugins without modifying the repo. For now, you need to add your template to the
templatedirectory. - Create a Python file for the node and another for the UI. Follow the naming convention used by other templates. Don't forget to add an
__init__.pyfile. We'll look at these two files in detail further down. - In the file, template/registry.py add an entry for your template where the key is the node type and the value is the UI class name. This tells the main window how to bind to the node.
- You'll also need to register your plugin node through Maya's regular plugin system. This is done in the file
CoreWeave.py. You should deregister plugins in the opposite order to which they are registered.
Anatomy of a template
Ultimately, the goal is to create a valid graph of task dependencies. This template system is designed to make it easier to create the most common graphs for 3d visual effects work. For example, you may want a graph to contain 50 render nodes. Rather than ask the user to create and configure each one individually, we can provide a single panel in the template that uses tokens to define the variability of all 50 nodes.
Each task in the graph is represented by a node with attributes. See here: https://github.com/ConductorTechnologies/cwstorm/blob/master/CLASSES.md#class-task-dagnode The template system in Maya is designed to facilitate the configuration of these attributes. There are several helper functions that help manage this set of attributes.
Job tab
The job tab is where you configure the job level properties, such as the author, the Conductor project, the name to appear in the Job index on the dashboard or desktop app, and so on.
Task tabs
There can be several task tabs for configuring the different flavours of tasks in the graph. The names, functions, and relationships of these task flavours are determined by you, the template author.
Other attributes
Create any other tabs you need to configure the job. You'll often need to configure at least one frame range. You can either augment an existing tab or create a new one, whatever makes the most sense for your template.
Tokens
Note the command:
render -r arnold -s {start} -e {end} -proj {mayaprojdir} -o {imagesdir}
Tokens in curly braces are replaced with values from the UI. The computeTokens method is responsible for generating these values. You decide how the tokens are generated and what their scope is.
Here's a table of the tokens that are generated for the cwSimRenderSubmission template:
| Token | Description | Example | Scope |
|---|---|---|---|
| nodename | Name of the template node | cwSimRenderSubmission1 | Job |
| scenepath | Path to the scene file | /projects/duck/scenes/slinky.ma | Job |
| scenename | Name of the scene file | slinky | Job |
| scenedir | Scenes folder | /projects/duck/scenes | Job |
| mayaprojdir | Maya project folder | /projects/duck | Job |
| imagesdir | Images directory | /projects/duck/images | Job |
| hostname | Name of the host machine | blueberry | Job |
| username | Name of the user | jmann | Job |
| sequence | Frame range | 1-7 | Job |
| seqstart | Start frame | 1 | Job |
| seqend | End frame | 7 | Job |
| seqlen | Length of the frame range | 7 | Job |
| chunk | Chunk as string | 1-2 | Chunk |
| start | Chunk start frame | 1 | Chunk |
| end | Chunk end frame | 2 | Chunk |
| step | Step frame | 1 | Chunk |
| chunklen | Length of the chunk | 1 | Chunk |
Compute the Job
The computeJob function is responsible for generating the payload. It is called any time data is requested from the output plug.
You use the Storm job scripting API in the computeJob function to construct the graph. There are already several helper functions that return Storm primitives from Maya attributes in the context of the tokens mentioned above. This means the primary function of the computeJob method is to define the way that nodes are connected to each other in the graph. For example: job.add(task1, task2) and so on. You can refer to the other templates in this repo, or take a look at the Storm API examples in the Storm job scripting documentation.
UI template.
The UI template is a Python class that inherits from CwTemplateBase. It is responsible for creating the tabs in the Storm Window when your particular template is loaded. You must implement some class methods and properties to make this work.
Defaults
DEFAULTS A structure that defines the default values for the attributes of the node. It is a dictionary where the keys are the attribute names and the values are the default values. This is used to populate the UI with default values when the template is first created.
CONNECTIONS An array of tuples that define the connections you want to configure between outside nodes and attributes of the template node. Each tuple is a pair of attribute names. This is used to create the connections between the attributes in the UI. If you don't want to create these two properties, you can override the setup method and do the set up however you like.
Binding
The node is bound to the UI by the bind() class method. It is called by the main window when the template is loaded. It is responsible for creating all the UI elements (tabs) and connecting the widgets to the node.
The connection is one way. The widgets in the storm window affect the bound node. However, if the user modifies the node in the attribute editor, the widgets in the storm window will not update. The system is designed so that users only need to use the storm window to configure the node.
Widgets
Most widgets you need have been built as reusable components. You can find them in the widgets module. For example, complex widgets like those needed for specifying valid software stacks, instance types, key/value pairs, or file paths are already implemented, along with methods to bind them to node attributes.